Tag Archives: learning

Charlotte Water Distance Learning: Scavenger Hunt

Activity: Charlotte Water themed scavenger hunt

Age range: All ages

Lace-up your walking shoes for this one! We’ve created a Charlotte Water themed scavenger hunt that anyone can do anywhere. You may not realize it, but your neighborhood is full of vital infrastructure that ensures you have access to safe drinking water and sanitary sewers. You may walk by this infrastrcture every day and not notice them.

Download the scavenger hunt board and check off as many items you can find, you may be surprised at everything you see right in front of your eyes. Let us know if you find all of the items by tagging us on social and you could win a prize!


Here is some information on the items you will be looking for:

Hydrant: Hydrants are placed all around the city, mainly as access points for firefighter use. However, they are also used to clean out any sediments from the water pipes and verify that sufficient water flow is available for use. When we test the hydrants it helps us determine any pressure weakness in the water pipes. Read our blog to learn more about hydrant flushing.

Charlotte Water Truck: Our crews use their trucks to visit various work sites around the city. These truck identify that they are part of the Charlotte Water crew, and are equipped with the necessary supplies to complete their daily tasks.

Charlotte Water Vactor Truck: These are large trucks with tanks attached and are used to remove blockages in wastewater pipes. Blockages are removed by using a strong jet of water to break the blockage up or by a vacuum to remove the blockages from the pipes. If you see one of these in your neighborhood, there is probably a blockage that our crews are working to break up so it doesn’t cause a sanitary sewer overflow. Learn how you can help us Keep Your Pipes Flowing Free here. 

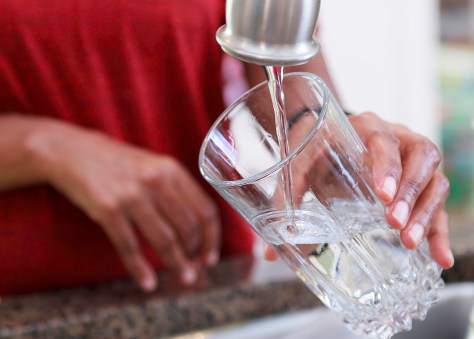
Water meter box: Inside of the box is a water meter that measures the amount of water being used in your home. This box can typically be found in the front of your home. Keep track of how much water you use in a day with our At-Home Water Audit and check out our website to learn how to read your water meter.

Water Valve cover: You may often see these covers (a small lid) in the road covering the valves. These valves under the covers allow our crews to turn the water off for maintenance or repairs. Some covers may have “Water” written on the top of the lid, or you may also see some covers that say “CMUD” which is an acronym for the former name of the Charlotte Water department, which was the Charlotte-Mecklenburg Utility Department.

Manhole Covers: Manholes are placed along the sewer lines to provide access to them as needed for inspections or removing objects from the pipes. Depending on their location, some manholes may be raised, while others are level with the road or surface. Raised manhole covers are typically found in low lying areas near creeks and streams so that water does not flow into the manhole during rain events. Check out our blog about inflow and infiltration to learn more.

Monitoring Station: These are stations that give us direct access to water main lines to test the quality of water. There are almost 300 across the county with plans to build more. Learn more about them here.

Water Tower: The primary purpose of a water tower is to help pressurize the water system for distribution throughout the city. That is why these towers stand high above buildings or towns – the water can flow down and the forces of gravity help to push the water through the pipes. Learn how to make your own water tower!

Sewer vent: These are in place to provide ventilation to the sewer system. Your home is also equipped with a vent for your plumbing system. Its primary function is to carry sewer gases safely away from your home.

A Charlotte Water crew working: Our crews work around the clock to keep our water and wastewater system working! You can spot them working around town at various job sites at any time of the day.

Water coloring page: We’ve added this item as a bonus!  Check out our blog post featuring various coloring pages – you can color one or all of them!


Charlotte Water Distance Learning: Home Water Audit

Activity: Track water usage for one day using our at-home water audit

Age Range: Upper Elementary and older

Do you ever think about how many times a day you use water? Just take a moment to think about all of the things you use water for – cooking, cleaning, bathing, brushing, drinking, and so much more! This activity is designed to bring awareness to the amount of water that we use throughout our day, everyday, even when we may not realize it.

Use the chart provided for just one day to keep track of all of the times throughout the day that you use water. The results may surprise you (and we would love to hear about them)! home-water-audit-data-sheet

To get started, begin making your water usage predictions (in Column A). We have provided a list of everyday activities, and we have also included some blank spaces at the bottom for you to fill in any activities that are not already provided.

Below we have also provided a Key to Flow Rates Chart, which lists gallons of water used per minute based on each activity.

Water Use  Gallons per minute  
Kitchen faucet2.5 gallons per minute  
Bathroom faucet2.5 gallons per minute  
Shower2.5 gallons per minute  
Toilet1.6 gallons per flush  
Washing machine25 gallons per load on large setting (High efficiency machines are 15 gallons)
Dishwasher8 gallons per load  
Garden hose3 gallons per minute with nozzle  
Key to Flow Rates Chart

1 cubic foot of water = 7.48 gallons
1 Ccf of water = 748 gallons
Ccf = Hundred cubic feet

After you have completed your At Home Water Audit, compare your predicted amounts to your actual amounts. Were you surprised? Are there ways you could have used less water? Was there an activity that you used water for that you did not predict?

As always, we would love to hear about how it went! Feel free to share your audits with us on social media and don’t forget to tag us:

The water audit was adapted from Project WET 


Charlotte Water Distance Learning: Make Your Own Water Filter

Activity: Build your own water filter (using household items)

Age Range: Upper Elementary – Middle School

It almost seems like magic the way that we can take water from a lake and turn it into safe, high quality drinking water from your tap.

For this activity, you can create your own magic by using household items to create a filter that is very similar to the way water is filtered and treated at our water treatment plants. Substitutions for materials can be used as needed – the idea is to understand how each step of the filtration process plays a key role in making your water safe to drink. 

First, it is important to understand what those steps are in the process. Today we are going to filter water through this five step process:

  1. Coagulation – During this step, liquid aluminum sulfate (alum) is added to the untreated (raw) water. When alum is mixed with the water it causes tiny particles of dirt in the water to stick together (coagulate).
  2. Flocculation – After alum as been added to the water, the alum and water mixture is stirred, causing larger heavier particles to form, called floc.
  3. Sedimentation – Once the floc particles have formed, the water is moved to a sedimentation basin where the heavy particles settle to the bottom.
  4. Filtration – After the water leaves the sedimentation basin, it flows through a filter made of layers of sand and carbon to remove any remaining particles left in the water.
  5. Disinfection – In this final step, chlorine is added to kill any germs or contaminants, and it keeps the water disinfected while it is pumped through the pipes. A small amount of fluoride is also added to protect teeth. (we will not replicate this step in our activity to keep it simple). 

Materials Needed: 

  • Large clear container filled with tap water
  • Dirt, trash, debris, or leaves (anything to make your water dirty)
  • One empty and cleaned 2-liter plastic bottle
  • Scissors
  • Two tablespoons of alum (this item can be found at the grocery store in the spices section. It is commonly used for making pickles.)
  • Sand
  • Gravel
  • Activated Charcoal
  • Cotton balls
  • Paper Towels
  • Coffee filters
  • A notepad and pen (for taking notes of your observations)

Directions:

  1. Make the water “dirty” by adding dirt, trash, or other debris. 
  2. Cut your 2 liter bottle in half. 
  3. Turn the top half of the bottle upside down and place in the bottom part of the bottle. The top half will be your filter and the bottom part will collect your filtered water. 
  4. Using your materials like paper towels, coffee filter, sand, gravel, charocal, and cotton balls create your own filter system in the top half of the overturned bottle.  
  5. Look at the dirty water and describe what you see; take notes of what you see.
  6. Add two tablespoons of alum to the dirty water. This step in the process is coagulation. Take notes on what you observe during this process. You should begin to notice the dirt particles sticking together.
  7. Then, stir the mixture slowly for five minutes. This step in the process is flocculation. Write down a prediction of what you think will happen next. You should notice larger particles starting to form.
  8. Next, let the water to sit for 20 minutes; observe the water every few minutes and note and changes. This step is the sedimentation process. You should see the particles settling at the bottom of the container.
  9. After your 20 minutes is up and the large particles have settled, carefully pour the water through the filter. This is the filtration process. Take notes on what the water looks like after it passes through the filter.

How did your filter work? Did any adjustments need to be made to your filter? Write down any final observations and thoughts you have about this experiment.

As always, we would love to see your homemade water filters. Let us know how it went by tagging us on social media!

Charlotte Water Distance Learning: Watching Water

Activity: Educational water-related films and tv shows.

Age range: All ages

We’re all about keeping things fun and entertaining with our distance learning activities, while also making them educational. For this activity, we’ve put together a list of water-related movies and TV shows (across a variety of streaming services) for keeping your mind working, while also relaxing.